Friday, November 25, 2011

Change IP Address In Ubuntu Server

To change IP address, you’ll need to edit /etc/network/interfaces
#sudo vi /etc/network/interfaces

For static IP addresses:
auto eth0
iface eth0 inet static
address 192.168.0.250
netmask 255.255.255.0
network 192.168.0.0
gateway 192.68.0.1
broadcast 192.168.0.255
 
For dynamic IP addresses:

auto eth0
iface eth0 inet dhcp

#sudo /etc/init.d/networking restart

Read more »

Thursday, November 24, 2011

How to Install Windows Server 2008 Step by Step

Installing Windows Server 2008 is pretty straightforward and is very much like installing Windows Vista, but I thought I'd list the necessary steps here for additional information. For those of you who have never installed Vista before, the entire installation process is different than it used to be in previous Microsoft operating systems, and notably much easier to perform.

Using Vista's installation routine is a major benefit, especially for a server OS. Administrators can partition the system's hard drives during setup. More importantly, they can install the necessary AHCI or RAID storage drivers from a CD/DVD or even a USB thumb drive. Thus, error-prone floppies can finally be sent to the garbage bin.

Note: Windows Server 2008 can also be installed as a Server Core installation, which is a cut-down version of Windows without the Windows Explorer GUI. Because you don’t have the Windows Explorer to provide the GUI interface that you are used to, you configure everything through the command line interface or remotely using a Microsoft Management Console (MMC). The Server Core can be used for dedicated machines with basic roles such as Domain controller/Active Directory Domain Services, DNS Server, DHCP Server, file server, print server, Windows Media Server, IIS 7 web server and Windows Server Virtualization virtual server.

To use Windows Server 2008 you need to meet the following hardware requirements:

ComponentRequirement
Processor• Minimum: 1GHz (x86 processor) or 1.4GHz (x64 processor) • Recommended: 2GHz or faster Note: An Intel Itanium 2 processor is required for Windows Server 2008 for Itanium-based Systems
Memory• Minimum: 512MB RAM • Recommended: 2GB RAM or greater • Maximum (32-bit systems): 4GB (Standard) or 64GB (Enterprise and Datacenter) • Maximum (64-bit systems): 32GB (Standard) or 2TB (Enterprise, Datacenter and Itanium-based Systems)
Available Disk Space• Minimum: 10GB • Recommended: 40GB or greater Note: Computers with more than 16GB of RAM will require more disk space for paging, hibernation, and dump files
DriveDVD-ROM drive
Display and Peripherals• Super VGA (800 x 600) or higher-resolution monitor • Keyboard • Microsoft Mouse or compatible pointing device


Upgrade notes:

I will not discuss the upgrade process in this article, but for your general knowledge, the upgrade paths available for Windows Server 2008 shown in the table below:


If you are currently running:You can upgrade to:
Windows Server 2003 Standard Edition (R2, Service Pack 1 or Service Pack 2)Full Installation of Windows Server 2008 Standard Edition
Full Installation of Windows Server 2008 Enterprise Edition
Windows Server 2003 Enterprise Edition (R2, Service Pack 1 or Service Pack 2)Full Installation of Windows Server 2008 Enterprise Edition
Windows Server 2003 Datacenter Edition (R2, Service Pack 1 or Service Pack 2)Full Installation of Windows Server 2008 Datacenter Edition


Follow this procedure to install Windows Server 2008:

1. Insert the appropriate Windows Server 2008 installation media into your DVD drive. If you don't have an installation DVD for Windows Server 2008, you can download one for free from Microsoft's Windows 2008 Server Trial website.

2. Reboot the computer.


3. When prompted for an installation language and other regional options, make your selection and press Next.


4. Next, press Install Now to begin the installation process.


5. Product activation is now also identical with that found in Windows Vista. Enter your Product ID in the next window, and if you want to automatically activate Windows the moment the installation finishes, click Next.


If you do not have the Product ID available right now, you can leave the box empty, and click Next. You will need to provide the Product ID later, after the server installation is over. Press No.


6. Because you did not provide the correct ID, the installation process cannot determine what kind of Windows Server 2008 license you own, and therefore you will be prompted to select your correct version in the next screen, assuming you are telling the truth and will provide the correct ID to prove your selection later on.


7. If you did provide the right Product ID, select the Full version of the right Windows version you're prompted, and click Next.


8. Read and accept the license terms by clicking to select the checkbox and pressing Next.


9. In the "Which type of installation do you want?" window, click the only available option – Custom (Advanced).


10. In the "Where do you want to install Windows?", if you're installing the server on a regular IDE hard disk, click to select the first disk, usually Disk 0, and click Next.


If you're installing on a hard disk that's connected to a SCSI controller, click Load Driver and insert the media provided by the controller's manufacturer.

If you're installing in a Virtual Machine environment, make sure you read the "Installing the Virtual SCSI Controller Driver for Virtual Server 2005 on Windows Server 2008"

If you must, you can also click Drive Options and manually create a partition on the destination hard disk.

11. The installation now begins, and you can go and have lunch. Copying the setup files from the DVD to the hard drive only takes about one minute. However, extracting and uncompressing the files takes a good deal longer. After 20 minutes, the operating system is installed. The exact time it takes to install server core depends upon your hardware specifications. Faster disks will perform much faster installs… Windows Server 2008 takes up approximately 10 GB of hard drive space.


The installation process will reboot your computer, so, if in step #10 you inserted a floppy disk (either real or virtual), make sure you remove it before going to lunch, as you'll find the server hanged without the ability to boot (you can bypass this by configuring the server to boot from a CD/DVD and then from the hard disk in the booting order on the server's BIOS)

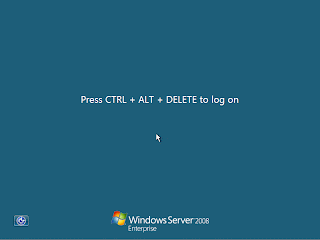
12. Then the server reboots you'll be prompted with the new Windows Server 2008 type of login screen. Press CTRL+ALT+DEL to log in.


13. Click on Other User.


14. The default Administrator is blank, so just type Administrator and press Enter.


15. You will be prompted to change the user's password. You have no choice but to press Ok.


16. In the password changing dialog box, leave the default password blank (duh, read step #15…), and enter a new, complex, at-least-7-characters-long new password twice. A password like "topsecret" is not valid (it's not complex), but one like "T0pSecreT!" sure is. Make sure you remember it.


17. Someone thought it would be cool to nag you once more, so now you'll be prompted to accept the fact that the password had been changed. Press Ok.


18. Finally, the desktop appears and that's it, you're logged on and can begin working. You will be greeted by an assistant for the initial server configuration, and after performing some initial configuration tasks, you will be able to start working.

Next, for the initial configuration tasks please follow my other Windows Server 2008 articles found on the Related Windows Server 2008 Articles section below.

For Official Microsoft information on Windows Server 2008, see the Windows Server 2008 homepage.

Read more »

Friday, November 18, 2011

How To Setup a DNS Server In Ubuntu

Overview
Would you like to setup a DNS Server in Ubuntu? How about setting up a private internal domain name at home? Well, you’ve come to the right place. There are number of tutorials on the internet showing you how to setup a DNS Server with Ubuntu using Bind 9. So, why another how-to document? That’s a good question. I’ve decided I needed to write a simple tutorial that anyone with a little bit of Linux knowledge would be able to follow. In the process, I hope readers are also able to learn how DNS works. Ok, let’s jump right to it!
What is DNS?
First of all, let’s cover the basics. What is DNS? DNS stands for Domain Name Server. It’s a service that runs on a server that translates humanly recognizable domain names such as www.yahoo.com or www.google.com into its assigned IP addresses. If the DNS server does not recognize the domain name being requested, it will forward the domain name request to another DNS server and so on until the name is resolved.
A typical DNS request is when someone is accessing a website. Let’s use the www.yahoo.com domain as an example. When a user clicks a Yahoo link or types the Yahoo URL on the address bar of the browser, the DNS server processes the domain request. If it doesn’t find www.yahoo.com on its DNS table, it will forward the request to another DNS server with a higher authority and so on until it finds a server with the URL entry. The IP address information is then sent back to the user’s browser. If the domain name is not found, a “server not found” message is displayed on the browser.
Assumptions
Enough with the DNS background. Let’s now start configuring our own DNS server. Let’s assume that we have the following: we want to create a private internal domain name calledmydomain.com, our private internal network is 192.168.0.x and our router and gateway is set at 192.168.0.1. Let’s assume all devices are going to be configured with static IP addresses. Normally, most computer systems nowadays are configured to automatically obtain IP addresses from the DHCP server/router. In this example, we will use static IP addresses to show how DNS works. Finally, we have 3 computers connected to our network:
  • Ubuntu Server, the DNS server – 192.168.0.9
  • Ubuntu Desktop – 192.168.0.10
  • PC – 192.168.0.11
Instructions
1. To install the DNS server, we need to install Bind 9.
sudo apt-get install bind9
2. Let’s configure Bind. We need to touch 5 files.
We will edit 3 files.
  • /etc/bind/named.conf.local
  • /etc/bind/named.conf.options
  • /etc/resolv.conf
We will create 2 files.
  • /etc/bind/zones/mydomain.com.db
  • /etc/bind/zones/rev.0.168.192.in-addr.arpa
A. First step. Lets add our domain zone – mydomain.com.
sudo vi /etc/bind/named.conf.local
# Our domain zone
zone "mydomain.com" {
   type master;
   file "/etc/bind/zones/mydomain.com.db";
};

# For reverse DNS
zone "0.168.192.in-addr.arpa" {
   type master;
   file "/etc/bind/zones/rev.0.168.192.in-addr.arpa";
};
Save file. Exit.
We just created a new domain. Please note: later we will create two files named mydomain.com.db and rev.0.168.192.in-addr.arpa files. Also, notice the reverse IP address sequence in the reverse DNS section.
B. Let’s add the DNS servers from your ISP. In my case, I’m using Comcast DNS servers. You can place the primary and secondary DNS servers here separated by semicolons.
sudo vi /etc/bind/named.conf.options
forwarders {
   68.87.76.178;
};
Save file. Exit.
C. Now, let’s modify the resolv.conf file found in /etc and place the IP address of our DNS server which is set to 192.168.0.9.
$ sudo vi /etc/resolv.conf
search mydomain.com.
nameserver 192.168.0.9
D. Now, let’s define the zones.
sudo mkdir /etc/bind/zones
sudo vi /etc/bind/zones/mydomain.com.db
$TTL 3D
@ IN SOA ns.mydomain.com. admin.mydomain.com. (
   2007062001
   28800
   3600
   604800
   38400
);
mydomain.com.  IN      NS         ns.mydomain.com.
ubuntudesktop  IN      A          192.168.0.10
www            IN      CNAME      ubuntudesktop
pc             IN      A          192.168.0.11
gw             IN      A          192.168.0.1
                       TXT        "Network Gateway"
The TTL or time to live is set for 3 days
The ns.mydomain.com nameserver is defined
ubuntudesktop, pc and gateway are entered as an A record
An alias of www is assigned to ubuntudesktop using CNAME
E. Let’s create a “rev.0.168.192.in-addr.arpa” file for reverse lookup.
sudo vi /etc/bind/zones/rev.0.168.192.in-addr.arpa
$TTL 3D
@       IN      SOA     ns.mydomain.com. admin.mydomain.com. (
                2007062001
                28800
                604800
                604800
                86400
)
        IN      NS      ns.mydomain.com.
1       IN      PTR     gw.mydomain.com.
10      IN      PTR     ubuntudesktop.mydomain.com.
11      IN      PTR     pc.mydomain.com.
3. Let’s restart Bind to activate our latest changes.
sudo /etc/init.d/bind9 restart
4. Finally, let’s test our new domain and DNS entries.
Dig
$ dig mydomain.com
Nslookup
nslookup gw
5. That’s it.

Read more »

Thursday, November 17, 2011

How to Determine a Location From an IP Address

Why would you need to know a person's location?
Every Internet user is assigned an IP address that traces their steps on the Internet while they are browsing web sites. Generally, ISPs provide each user with a IP address that is either dedicated to their account or rotates as often as hourly, services such as AOL use a rotating IP address for various customer location ranges that potentially thousands of customers may be surfing with at one time.

There are many different reasons why you may need to know where a user comes from. Some web sites keep detailed records of who visits what pages, who views what for how long and who downloads something from a particular page. These statistics help determine a web site's metrics as well as gage different factors for a web master who might be trying to figure out where to go next with ads, content or products.

For example, if a web master who sells pre-paid phone cards realizes that a particular value of cards is not selling to a certain population, perhaps, the web master will re-evaluate carrying those phone cards for another type that might do better in that area. These types of statistics can help set the tone and merit of a particular web site and cater towards a general demographic of visitors which in the long ran help keep the web site afloat.

Metrics play an important part in any web site that is seeing a lot of traffic. Everything from search engine optimization to marketing techniques can be determined by where your visitors come from and what they are browsing while they are there. This can help a web master determine the best route to go in marketing a product or service in a particular area for that specific demographic.

Other reasons for determining a person's location can be simple or more discrete. Forum administrators and moderators may deal with problem posters on a daily basis who have been banned from their boards. Some posters feel the need to circumvent a ban, and IP addresses can determine if such a user is breaking a ban. This information can help administrators find the poster in question and report them to their ISP for the infraction should such action be necessary.

Web sites, forums and chat rooms that use date and time scripts can use a person's location to determine the correct date and time to showcase. This information can also be helpful to determine when users are browsing from during a time of the day for metrics purposes.

Everything from e-mail to instant messages can be traced via IP with the right software. Every time you visit a web site, download a program or music file or even surf via a proxy server can be traced back to your original IP address with a little bit of detective work.


How do I go about determining a location from an IP address?
The easiest way to go about determining a location from an IP address it look it up in reverse. Web sites and programs can do this for you with little effort, but since most web browsers are not using a dedicated IP address assigned from their provider, more work is necessary to pinpoint their exact geographical region.

You can go to WhoIs.sc and plug in an IP address or web address and learn the details behind it. This, as illustrated, is the easiest way to go about determining where an IP address leads.

Most countries user their own country code domain, typically referred to as ccTLDs. Many countries even go so far as to list the city, region or closest metro area within the domain to track them further. A few examples of country codes include BH for Bahrain, DO for the Dominican Republic, HU for Hungary, LY for Libya and SN for Senegal.

With a little deductive reasoning, you can figure out from the canonical address where exactly in a given area a person is surfing from.

Let's look at an example of a canonical address: dialup-4.155.253.110.Dial1.Baltimore1.Level3.net. Already, we know two facts about this particular user: First, this web browser is using dialup and hails from Baltimore. Chances are they are using a rotating IP address and hardly ever surf with the same one twice.

Another example, 70.129.13.254, when traced back via a WhoIs search reveals this resolves to Texas Womens University in Denton, Texas. If you were having a problem with this poster on a forum or web community, the WhoIs information will provide you with the necessary contact information to inform the university of problems should the need arise.

You can breakdown the IP address of any web user to find out facts about that particular address and figure out what part of the world they may come from, in the one example, down to the city and in the other down to a specific portion of the city.

Is it full proof?


Determining a web browser's location from their IP address is by no means full proof. For most users, you can determine where they come from or who their ISP is with little problem. For more advanced Internet users, proxy servers and other tools of Internet circumvention may stop you from getting to the truth of a user's location in the world. Users depend on proxy services and software to keep their identities hidden. Some users prefer to surf anonymously or they cannot visit specific web sites because their ISP prohibits it.

With a little bit of research and some practice, anybody can learn about their web site's users from their IP address and use the information to their advantage. There are many resources on the Internet as well as in print that will guide you through more advanced procedures to track users and find out where in the world they come from. The more you learn, the more precise you will become at determining where an IP address leads. Taking the time to learn these techniques may just make your web site more profitable or keeping unruly chatters or posters at bay.

Want to know more?

Read more »

Configuring Network Interfaces in Ubuntu Server

Configuring Network Interfaces in Ubuntu

vi /etc/network/interfaces

the above command will allow you to edit the network configuration file , to start editing the file press insert and start to input your network settings.

# This file describes the network interfaces available on your system
# and how to activate them. For more information, see interfaces(5).

# The loopback network interface
auto lo
iface lo inet loopback

# The primary network interface
auto eth0
iface eth0 inet static
        address 192.168.0.100
        netmask 255.255.255.0
        network 192.168.0.0
        broadcast 192.168.0.255
        gateway 192.168.0.1

So above we have the network setup with auto ethernet interface 0,
setup with a static ip address, you can also use dhcp by replacing
static with dynamic.

Once you have entered all your values follow the steps to write the
changes

1. Press ESC
2. Hold Shift and press ";" Key
3. Now write wq , to write then quit
4. use q! to exit without making changes

Configuring Network Interfaces in Ubuntu Server, CONFIGURING NETWORK INTERFACES IN UBUNTU SERVER, How to Configuring Network Interfaces in Ubuntu Server, Cara Setting Ip di Ubuntu Server

Read more »

How to install Ubuntu Server 9.04 Linux Operating System

Ubuntu Server 9.04 Installation Guide
So before we start the installation make sure that you have your Harddrive formatted and Ready or a blank Virtual Machine Ready.

Now go and download the Ubuntu Server 9.04 Edition from


http://www.ubuntu.com/getubuntu/download-server

It is compatible with both AMD and INTEL, the only option you need to look as is whether you want to run a 32 bit or 64 bit version, most likely it will be 32bit and I will be going through the steps for the 32 bit version.

So apart from downloading ubuntu you can get it sent to you for FREE or buy the DVD, it can take up to 4 weeks for the FREE version to reach you.

Starting the Installation
New Machine

So for a setup on a new machine simply burn the .ISO image to a CD or DVD and insert it into your DVD drive.

Now when your computer starts up you'll want to press F8, F10, or F11 depending on your motherboard do enter the boot options. Alternatively you can enter your BIOS using DEL or F1 and configure boot options to use the CD-ROM drive as your First Boot Priority.

Virtual Machine

Installing on a Virtual Machine is a lot simpler , just install DAEMON tools or an image mounting software and mount the image on a virtual drive, and start up your blank virtual machine.

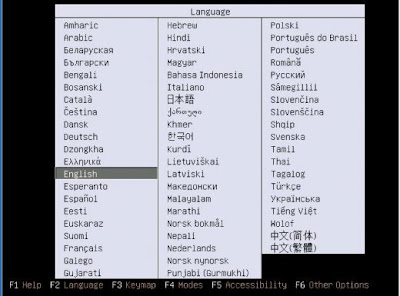
Select your Desired Language for your Operating System
Here you can Test your Memory , check the disc for defects or continue with the Installation 
"Install Ubuntu Server"
Once again Select your Desired Language
Select your country
Ubuntu Installer Main Meny - Detect Keyboard Layout
Now its time to detect your keyboard layout , you can choose no if you know exactly what type of keyboard you have (as in layout of keys to specific country requirements) . Its easier to go through the keyboard layout test and hit yes or no if the letter appears on your keyboard

It will then go through the process of configuring basic network settings, and peripheral 
devices

Configure the Network - Hostname


Now its time to choose a hostname , you can make up anything you want its recommended to keep it nice and short so its easier to access through a command line only interface. Here I just chose the default name ubuntu


Setting up CLOCK


Now it will go through the process of contacting the world clock server, and may ask you
to select your time Zone from a list
Select from a Worldwide list , if that makes it easier


The Disk partitioner will then scan through your Disk drives
Logical Volume Management
So now we are up to partitioning options, We can select to use the guided method or setup things manually, here I will just choose Guided

You can also choose to use LVM , which stands for logical volume management. LVM role is to basically allow the server administrator to have full control over there partitions and create logical volume's from physical drives.

This is very useful for a server that may require modification of partitions, its very common to find you have made a partition too small and need to expand it and this is possible with basic partitioning programs like gparted but usually require your server be restarted LVM allows you to resize your paritions and keep your server up.

Here I will use entire disk with LVM, if your not so worried about running out of room on your partitions then use entire disk would be an acceptable option.

Here I select my disk I wish to install ubuntu onto.
Apply changes to your Partition to Continue,
REMEMBER writing the changes will erase anything else currently on that partition
Select partition size

Once partitioning has been setup it will start to install main components of the ubuntu operating system
Username and Passwords

Now choose your full name for the user, its simply your name not your actual login one just your full name or anything you want to use instead
Now enter your username, this will be the username you log into the server with
Enter your password for your username to login with
You can choose to encrypt your home directory for security reasons but generally it is not necessary
Configuring APT
Now Ubuntu goes through the process of configuring APT (advanced packaging tool) this tool allows you to download and install updates for your server. example get openssh apt-get -y install openssh

Freezes? - Some users may notice some freezing or sometimes the installation appears to stop completely this is usually due to the Ubuntu server being busy and your computer unable to contact it, if this occurs it may be necessary to try again later or just leave it for a while.


Here you can choose whether or not to allow automatic updates, its recommended to get security updates automatically otherwise choose no automatic updates and manually update security features as patches come out
Almost Finished
here you can choose software needed for your
server, you can always skip this an install
components needed later on using APT
Now once you've selected the software you want for your server, ubuntu will finishing installing all the needed software.

Starting Ubuntu Server 9.04

So once you've completed the installation select CONTINUE and your system will reboot , remember to remove the CD or unmount the image at this point.

Now once it loads up simply log in with your username and password. :) that's it for the basic installation instructions. let me know if you have any questions
login and off you go

How to install Ubuntu Server 9.04 Linux Operating System, HOW TO INSTALL UBUNTU SERVER 9.04 LINUX OPERATING SYSTEM, Cara Install Ubuntu Server, cara install ubuntu server

Read more »