So before we start the installation make sure that you have your Harddrive formatted and Ready or a blank Virtual Machine Ready.
Now go and download the Ubuntu Server 9.04 Edition from
http://www.ubuntu.com/getubuntu/download-server
It is compatible with both AMD and INTEL, the only option you need to look as is whether you want to run a 32 bit or 64 bit version, most likely it will be 32bit and I will be going through the steps for the 32 bit version.
So apart from downloading ubuntu you can get it sent to you for FREE or buy the DVD, it can take up to 4 weeks for the FREE version to reach you.
Starting the Installation
New Machine
So for a setup on a new machine simply burn the .ISO image to a CD or DVD and insert it into your DVD drive.
Now when your computer starts up you'll want to press F8, F10, or F11 depending on your motherboard do enter the boot options. Alternatively you can enter your BIOS using DEL or F1 and configure boot options to use the CD-ROM drive as your First Boot Priority.
Virtual Machine
Installing on a Virtual Machine is a lot simpler , just install DAEMON tools or an image mounting software and mount the image on a virtual drive, and start up your blank virtual machine.
 |
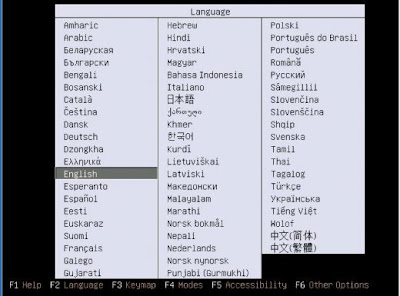
| Select your Desired Language for your Operating System |
 |
| Here you can Test your Memory , check the disc for defects or continue with the Installation "Install Ubuntu Server" |
 |
| Once again Select your Desired Language |
 |
| Select your country |
Now its time to detect your keyboard layout , you can choose no if you know exactly what type of keyboard you have (as in layout of keys to specific country requirements) . Its easier to go through the keyboard layout test and hit yes or no if the letter appears on your keyboard
 |
| It will then go through the process of configuring basic network settings, and peripheral devices |
Configure the Network - Hostname
Now its time to choose a hostname , you can make up anything you want its recommended to keep it nice and short so its easier to access through a command line only interface. Here I just chose the default name ubuntu
 |
 |
| Now it will go through the process of contacting the world clock server, and may ask you to select your time Zone from a list |
 |
| Select from a Worldwide list , if that makes it easier |
 |
| The Disk partitioner will then scan through your Disk drives |
Logical Volume Management
So now we are up to partitioning options, We can select to use the guided method or setup things manually, here I will just choose Guided
You can also choose to use LVM , which stands for logical volume management. LVM role is to basically allow the server administrator to have full control over there partitions and create logical volume's from physical drives.
This is very useful for a server that may require modification of partitions, its very common to find you have made a partition too small and need to expand it and this is possible with basic partitioning programs like gparted but usually require your server be restarted LVM allows you to resize your paritions and keep your server up.
Here I will use entire disk with LVM, if your not so worried about running out of room on your partitions then use entire disk would be an acceptable option.
 |
| Here I select my disk I wish to install ubuntu onto. |
 |
| Apply changes to your Partition to Continue, REMEMBER writing the changes will erase anything else currently on that partition |
 |
| Select partition size |
 |
| Once partitioning has been setup it will start to install main components of the ubuntu operating system |
Username and Passwords
 |
| Now choose your full name for the user, its simply your name not your actual login one just your full name or anything you want to use instead |
 |
| Now enter your username, this will be the username you log into the server with |
 |
| Enter your password for your username to login with |
 |
| You can choose to encrypt your home directory for security reasons but generally it is not necessary |
Configuring APT
Now Ubuntu goes through the process of configuring APT (advanced packaging tool) this tool allows you to download and install updates for your server. example get openssh apt-get -y install openssh
Freezes? - Some users may notice some freezing or sometimes the installation appears to stop completely this is usually due to the Ubuntu server being busy and your computer unable to contact it, if this occurs it may be necessary to try again later or just leave it for a while.
 |
Almost Finished
 |
| here you can choose software needed for your server, you can always skip this an install components needed later on using APT |
Now once you've selected the software you want for your server, ubuntu will finishing installing all the needed software.
Starting Ubuntu Server 9.04
So once you've completed the installation select CONTINUE and your system will reboot , remember to remove the CD or unmount the image at this point.
Now once it loads up simply log in with your username and password. :) that's it for the basic installation instructions. let me know if you have any questions
 |
| login and off you go |
How to install Ubuntu Server 9.04 Linux Operating System, HOW TO INSTALL UBUNTU SERVER 9.04 LINUX OPERATING SYSTEM, Cara Install Ubuntu Server, cara install ubuntu server


0 comments:
Post a Comment